Upcycling projects are a fantastic outlet for self-expression and passion. There are SO many ways a person can introduce sustainability into their lives. Sustainability is a balance between economic growth, caring for and protecting the environment, and promoting social well-being. And, while this isn’t a new concept, it has grown in popularity in recent years due to the increased awareness of how our actions impact the world around us. Even the smallest steps can make a significant difference when it comes to making conscious shopping, traveling, and artistic choices.
Many artists – both novice and experienced – are exploring their creative outlets through upcycling art projects. Upcycled art is the process of taking recycled waste and turning it into something new. It is essentially seeing promise in something that might otherwise spend years, if not decades, in a landfill.
Home décor is what transforms your spaces into something that represents you. It is what helps make your house feel like a home. However, home décor can be expensive and is often made with materials that can’t be recycled. When someone decides to redecorate, their old décor may then end up in a landfill. When it is time to revive the rooms of your home, consider skipping the big box store and turn to your own creative abilities.
You don’t have to be an artistic genius to have some fun, get creative, and dive into an upcycling art project.
The Importance of Upcycling
Upcycled art in itself is a form of recycling. It helps to reduce waste and put fewer items in the landfill. Landfills have several adverse effects on your health and environment. Materials and wastes left to decompose release pollutants into the air and increase the amount of greenhouse gas emissions. Waste that fills landfills also produces toxic chemicals that could find their way into our water supplies. Much of the materials that could be found at a landfill could have been recycled or repurposed in some way.
Upcycling can create positive changes in the cycle of consumerism. Products have to be created, put on the shelf, purchased, and utilized. Sadly, after this process, they are usually eventually wasted. This life cycle of consumerism impacts our environment due to the energy used in producing these goods and products. Upcycling reduces the energy necessary to produce goods and decreases the need for new raw materials to be introduced into the cycle. When you upcycle, you are making a significant impact that promotes more sustainable practices.
Upcycling in any manner, even if it is not artistic, helps reduce our carbon footprint. Finding ways to reuse products can help decrease a demanding cycle of consumerism that impacts our health and the environment.
DIY Upcycling Projects
These fun, creative upcycling art projects are a great way to tap into your artistic side. You’ll love how easy they are to do and how they can transform your space. When it comes to home decor, there are endless possibilities. You’ll find so many ways to reuse items that once felt like junk. Whether this is your first project or your thousandth, get ready to be creative!
Vintage Suitcase Shelves
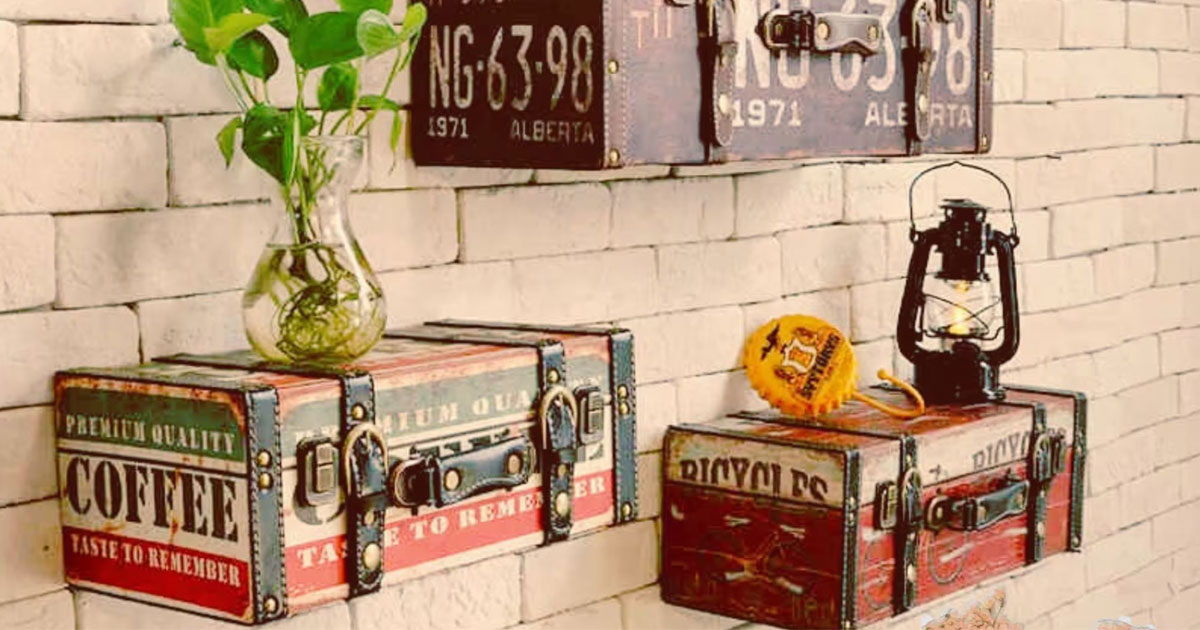
Whether you have a closet full of unused suitcases at home or you enjoy a little thrift shopping, you’ll love the look these shelves can add to your home! Most luggage is made with non-recyclable material, which means they could spend a long life in a landfill. If you’ve been craving more room to add plants, décor, or photographs to your walls, these shelves are a perfect project.
To begin, you’ll need your suitcases. Look for options that provide various widths and colors. You also want suitcases that are still in good shape, though they do not have to be functional. You can look for options at thrift stores, flea markets, and garage sales. You are also going to need:
- Blue tape
- Saw
- Brackets
- Plywood panels
- Nails
- Glue
There are a few easy steps to create eye-catching shelves that are sure to elevate the look of any space by upcycling suitcases.
- You’ll first want to choose a depth and use the blue tape to create your perimeter. Remove any lining or fabric that could get caught in the blade.
- You’ll then cut the suitcase. Be sure to watch for hardware and be certain that your saw is designed to handle metal. You’ll likely cut through a variety of materials.
- Now it’s time to hang! Depending on the amount of weight you intend to put on the suitcases, you may only need angle brackets. If you want to increase strength, you can glue and nail plywood panels to the suitcase and use studs or anchors to hold.
Wine Bottle Chandelier
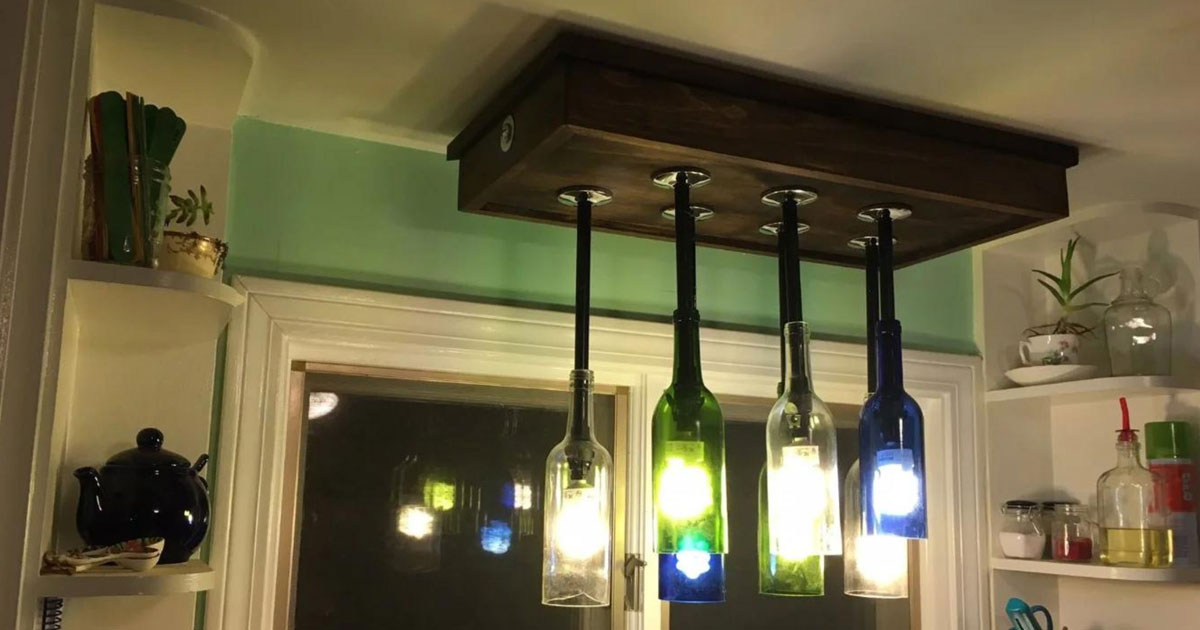
Glass bottles can be used to create a wide range of creative upcycling art projects. From wine bottles, liquor bottles, mason jars, and everything in between. Your options are truly endless. Glass can be colored, cut, shaped, and utilized to make breathtaking centerpieces and even chandeliers.
To create your own wine bottle chandelier, you’ll need:
- Clean wine bottles – six to ten is a good number depending on the desired design and size of your chandelier
- 1 spool of twine
- 1 spool of clear elastic cord
- Battery-operated twist lights, one for each bottle
- Wood discs- medium and large sizes
- Frame- metal, wood, or other recycled materials
- Hot glue gun and glue sticks
- Scissors
- You’ll want to start by cutting off the bottoms of the bottles, though you can choose to leave them whole.
- You’ll then thread a medium-sized wood disc onto the twine and thread it into the neck of the bottle. Use the larger wood disc to tie the end in a knot to secure.
- Cut a piece of elastic that is around 7” long. Thread one end through the twist light loop and pull together. Once that is set, pull the top end of the twine so that the wood disc is in the neck of the bottle. Add glue to prevent shifting and tie a knot in the twine to hold the bottom disc and light.
- Cut the twine to your desired hanging length, leaving some room to tie securely. Repeat for each bottle.
- You’ll then have to determine your desired length as you add your bottles to your frame.
Book Planter
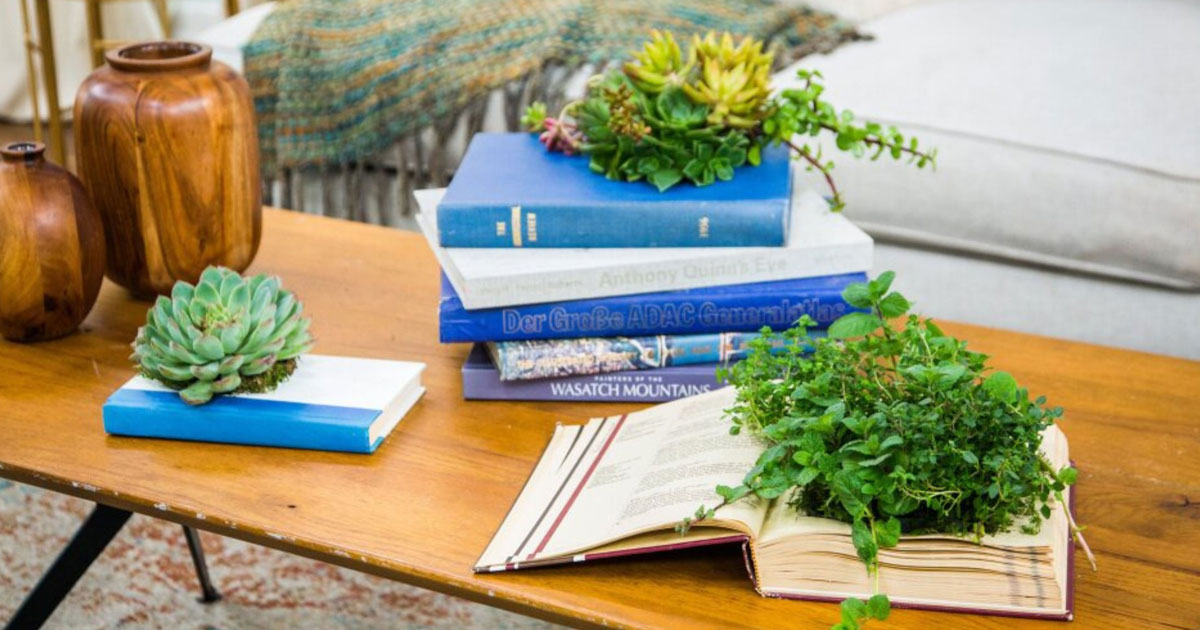
If you are looking for a project that is simple, easy, and adds beauty to your home, then a book planter is the perfect craft. You have to try this one. Book planters are a great way to put to use those books just sitting on your shelf collecting dust. This project is also a great excuse for adding more plant life to your home or office. To get started you’ll need:
- A book (libraries often have free books they are discarding if you don’t have any to part with)
- White glue
- Pen
- ScissorsX-Acto knife
- Ruler
- 1-quart zip-loc bag
- Your choice of plant – succulents work great!
- You’ll want to start by gluing the pages of the book together. Simply glue along the sides, gently pressing the glue into the paper. Don’t glue the paper to the cover. Wait for the glue to dry, for at least 20 minutes.
- Measure and mark the circumference of the space you want for your plant. Keep in mind you want to leave plenty of room for the roots. Measure and trace the area you need to cut using the first page of the book.
- Use your X-Acto knife to cut the box you’ve measured. You’ll have to repeat this step numerous times to get the depth you need for your plant.
- Line your box with your plastic bag, ensuring you have enough to cover the bottom and sides. Place your desired plant inside and cut away excess plastic.
- Fill with dirt and enjoy!
Magazine Coasters

Magazines are often enjoyed briefly, given a single read-through before ending up in the garbage. Coasters are a great way to reuse this material and keep water rings off your furniture!
All you need is:
- Old magazines
- Scissors
- Paper clip
- Modge Podge or rubber cement with a brush
- Start by ripping out colorful pages from your magazines. Fold the straight edge over about ¼ of an inch. Make about four folds, keeping the sizing consistent so that your coaster lies flat.
- Spread glue along the edge and fold once more. Cut along the edge until you have a thin strip. You’ll want to repeat this process until you have around 30 strips.
- Your first strip will be the center of your coaster. Apply glue along one side of the strip. Then, using an opened paperclip to ensure your coaster is tight, slowly roll the strip around the clip.
- Use glue to connect the start of a new strip with the end of the previous strip. This creates a smooth flow. Continue this process until you get the size coaster you desire.
- Allow to dry and enjoy!
Record Album Wall Art
There are several ways that you can use old record albums to add a touch of creativity to your home décor. One simple way is to create a wall of records. All you need is:
- Record albums
- Frames
- Wall-mounting adhesive
- Choose your desired albums
- Frame them
- Use wall adhesive to mount
Mason Jar Soap Dispenser
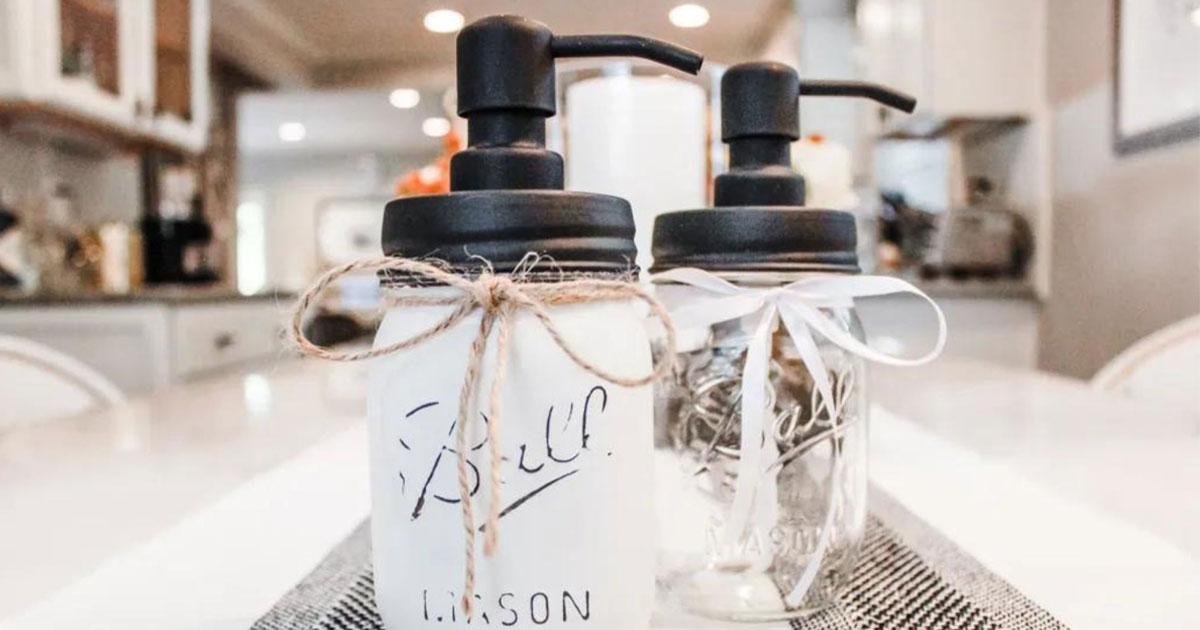
There are endless uses for mason jars. From storing produce to make it last longer to creating fun drink glasses, you don’t have to do much to make them useful. However, you can make them cute! Reusable soap dispensers are one way to do that. Not only do they add a touch of class to your bathroom, they help cut down our use of harmful plastics that can’t be recycled. For this project you’ll need:
- Mason jar
- Paint
- Soap pump
- Paring knife
- All-purpose glue
- Paint or decorate your jar; you can use spray paint or any glass-friendly paint to create a simple or dynamic jar.
- Use a paring knife to cut a hole roughly the size of the soup pump at the top of the jar lid.
- Add the soap pump (you can recycle one from a used dispenser).
- Use your glue to secure the pump to the underside of the mason jar lid.
- Once everything is dry, add your soap and enjoy the new look and feel of your bathroom or kitchen.
Wooden Pallet Coffee Table
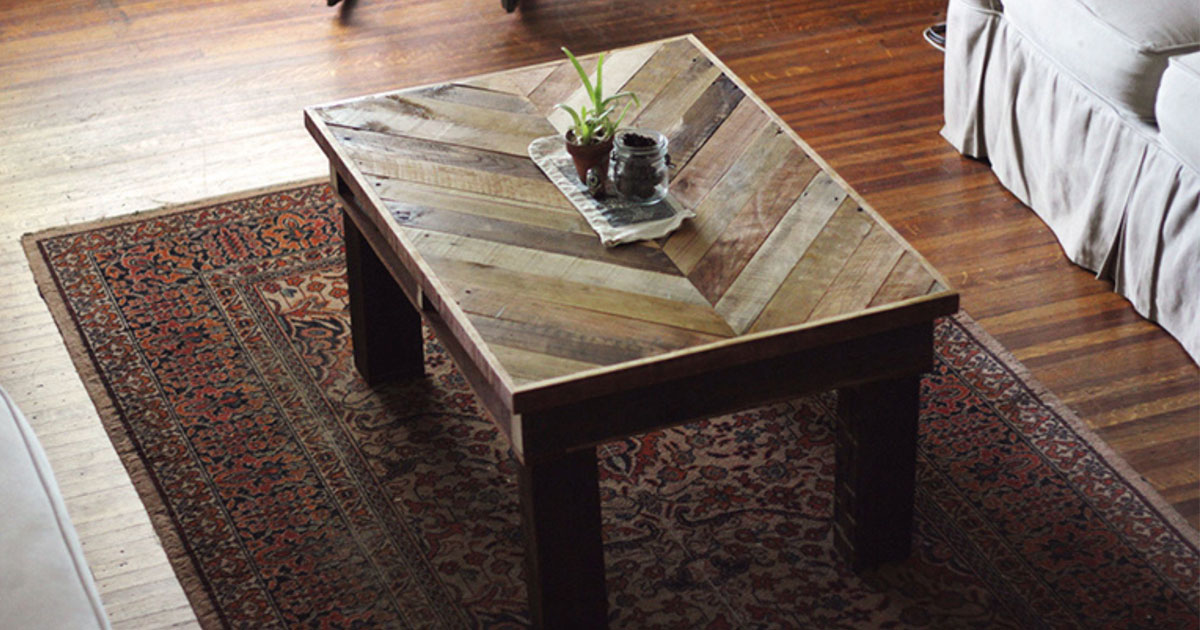
Wooden pallets are extremely versatile and can be used for a wide variety of home décor projects. One of the most popular projects is creating coffee tables using wooden pallets. You’ll have plenty of options when it comes to size, design, and appearance. For a simple coffee table, you’ll need:
- Wood pallets
- Sanding tools
- Cutting tools
- Varnish
- Screws
- Start by removing boards from the top. You’ll likely need to remove any old nails
- Place boards back on the frame side by side.
- Cut off the excess frame.
- Screw the boards down.
- Cut legs to size and screw them into the bottom.
- Sand and stain.
- Varnish.
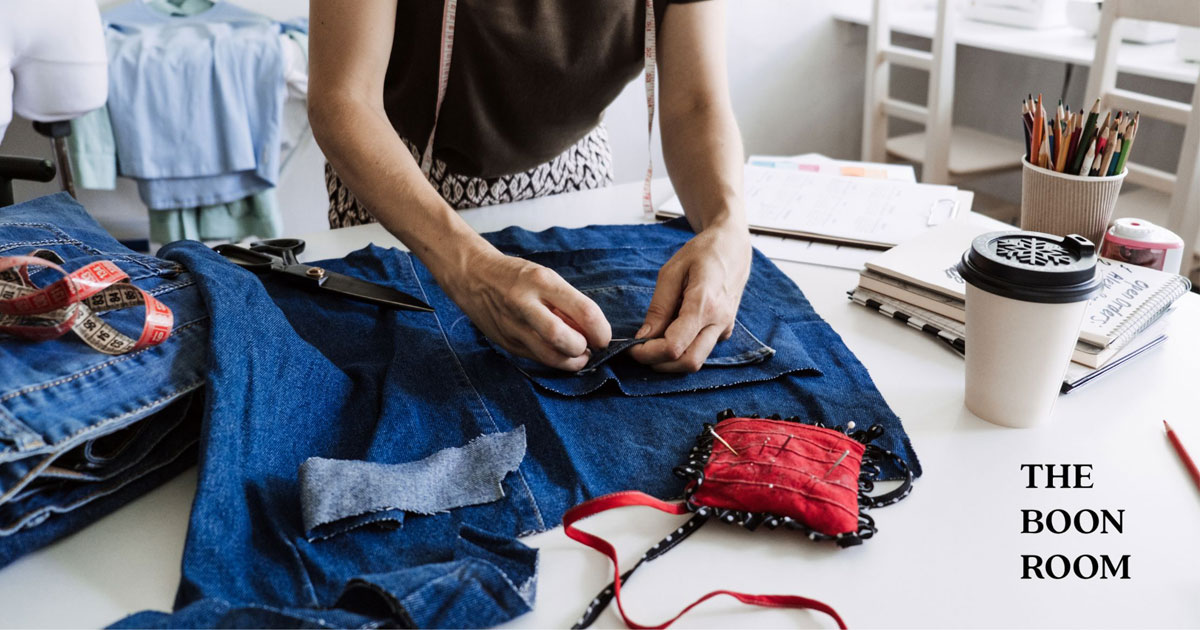
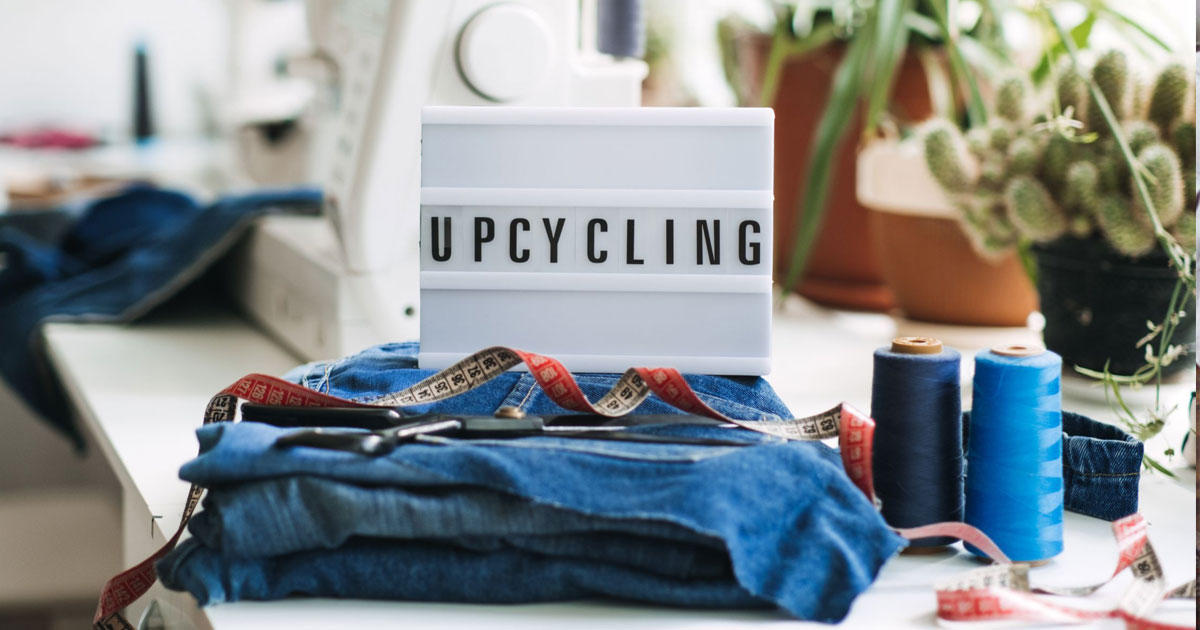
Denim Rug
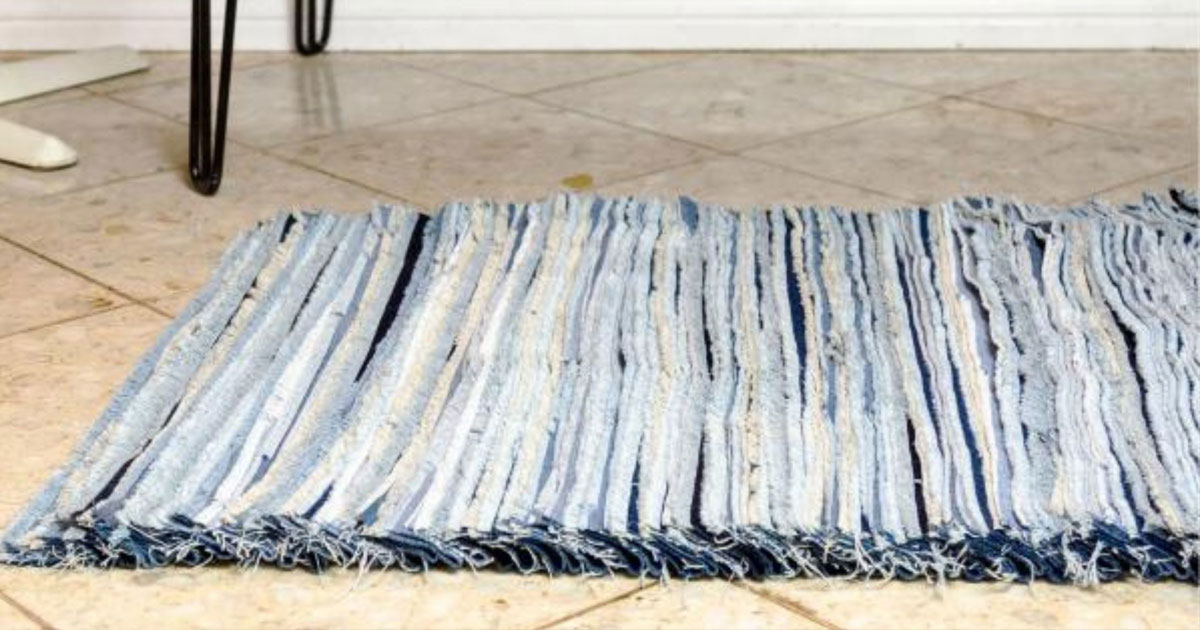
The fashion industry produces a significant amount of pollution and harmful greenhouse gas. In a move to be more sustainable, finding ways to repurpose clothing is increasing in popularity. When thinking about home decor, you’ll love how versatile a pair of old jeans can be. For this project you will need:
- Approximately four pairs of jeans depending on style and size
- Sewing shears
- Scissors, ruler, and a pen
- Crochet or latch hook
- Cut denim into ¾ inch wide strips along the length of the fabric from waist to leg hems. You’ll want to use heavy-duty sewing shears or a rotary cutter.
- Cut the strips into 4-inch lengths.
- Start at the top of the mesh backing, inserting a latch hook into a hole between the weave in one corner. Slide the hook under the thread and back up to the top. Fold a 4-inch piece of denim in half and place the folded edge into the latch hook.
- Pull the jook back through the hole, holding one end of the denim. Both ends of the 4-inch piece should be the top face of the rug.
- Tie a square knot at the end, pulling it tight.
- Repeat this process to create a shaggy denim rug that is sure to impress.
T-shirt Yarn Macrame Plant Hanger
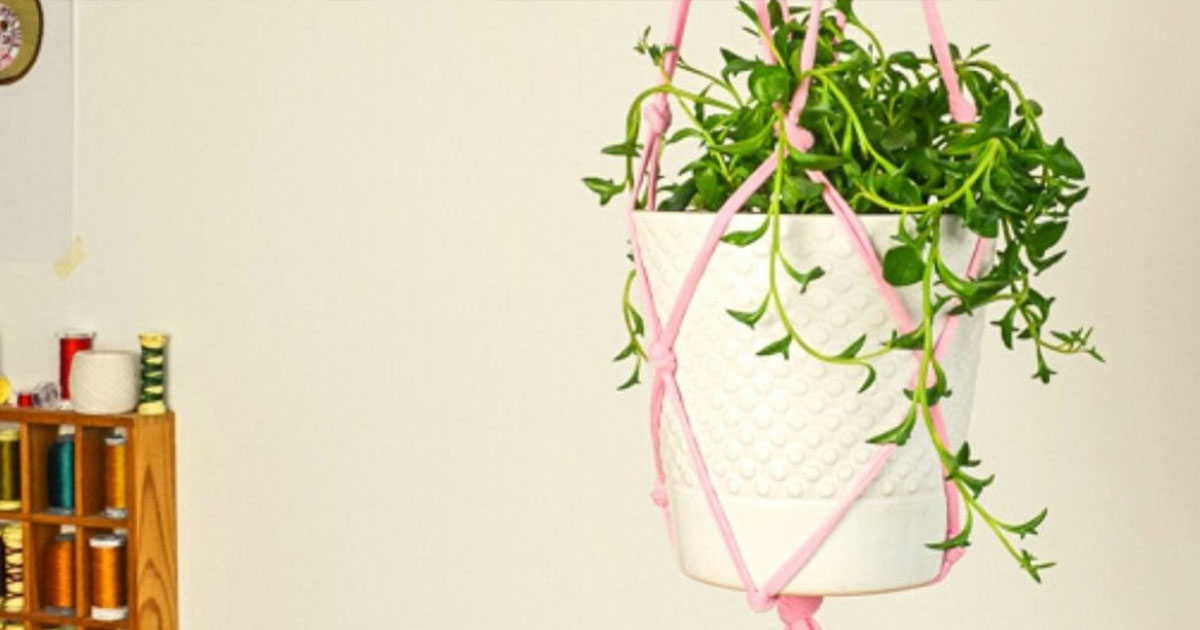
Hanging plants can improve air quality, as well as add a great touch to the appearance of any room in your home. Supplies you’ll need include:
- T-shirt
- Mason jar
- Scissors
- Cut off the sleeves and bottom hem of the t-shirt.
- Cut along shoulder seams and one side seam.
- Cut eight pieces of fabric, around one inch thick.
- Put the strips together and tie a knot at the end.
- Separate fabrics into groups of two, tying each group 2 inches above the initial knot.
- Take one strip from a group and tie it with a strip from another group. Repeat until there is a second layer of knots.
- Twist the two pieces of fabric from the four groups together and tie a knot six inches up.
- Braid the strips of fabric together and add a loop at the end.
- Add the mason jar and your desired plant, and you’re ready to hang.
DIY-painted Tire
Tires can spend a lifetime in a landfill. Instead of allowing old tires to waste space, create some amazing furniture for your home. For this project, you’ll need:
- Paint
- Old tire
- Wood panels
- Saw
- Ruler and pen
- glue
Tires can be used to create fun flower planters or in-home ottomans and tables. To create a unique ottoman, you’ll need:
- Clean the tire.
- Measure the interior circumference and cut your wood to place on top of the tire. You can also use cushioned material, or twine depending on the final look you would like to achieve
- Glue or nail your material to the tire.
- Paint, wrap, or decorate the exterior to match your unique style.
Get More Sustainability Ideas
There are so many unique sustainability ideas for you to try. Upcycling is one way that you can minimize waste and change the look and feel of your home in a way that is affordable and better for the environment. These upcycling art projects are a great way to get creative and try something new. Finding ways to reuse packaging materials, clothing, and other materials is a great step towards living more sustainably… plus, so fun! Right?
Jenny Weatherall is the co-owner and CEO of Eminent SEO, a design and marketing agency founded in 2009. She has worked in the industry since 2005, when she fell in love with digital marketing… and her now husband and partner, Chris. Together they have 6 children and 3 granddaughters.
Jenny has a passion for learning and sharing what she learns. She has researched, written and published hundreds of articles on a wide variety of topics, including: SEO, design, marketing, ethics, business management, sustainability, inclusion, behavioral health, wellness and work-life balance.